Hummus
Posted: July 15, 2024 Filed under: beef, Dairy-free, Gluten-Free, Mains, salad, Side Dishes, Traditional, vegan, vegetarian | Tags: chickpeas, hummus Leave a comment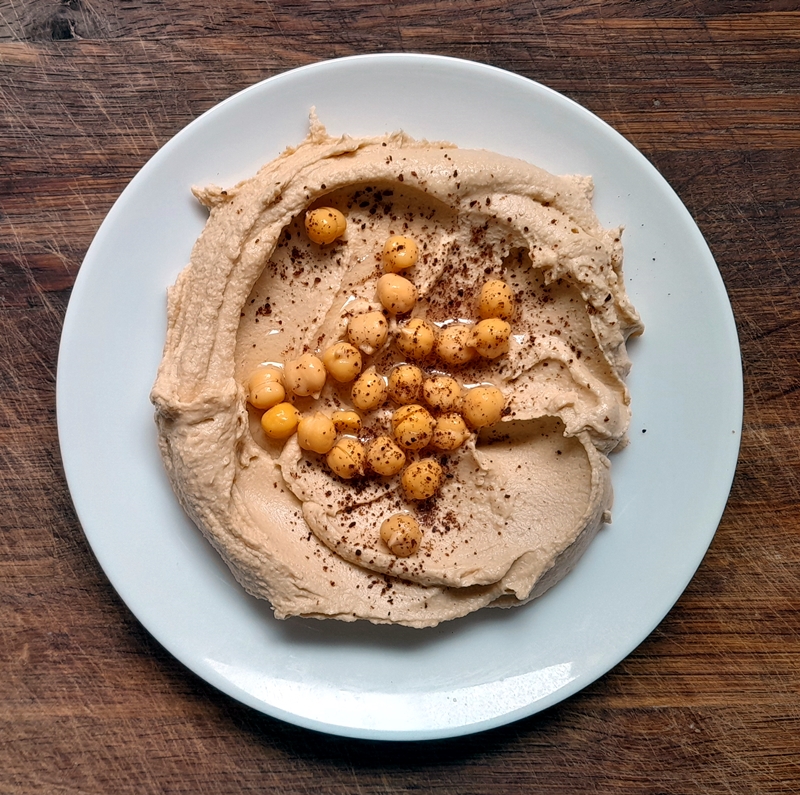
Wotchers!
I love hummus. I’ve been eating it for decades, but for one reason or another, not so much in recent years.
Peak hummus consumption was probably during my years working in the Middle East. I taught at an international school in Kuwait for four years, just after the liberation in 1991 until 1995. There was a small chicken shop opposite the school, on my way home, and it was a favourite lazy lunch to call in for a rotisserie chicken, soft Arabic bread, and containers of ful medames (broad bead stew) and hummus. Warm roasted chicken rolled up in soft, fluffy bread spread thickly with creamy hummus perhaps isn’t a combination that first springs to mind, but I can heartily recommend it if you haven’t already.

Opening a kitchen drawer the other week and seeing the same pack of dried chickpeas that has been staring at me for the past 12 months, I resolved to whip up a batch using soaked/cooked chickpeas, rather than opening a tin. I hauled out an old recipe from the files that I’d bookmarked from a Canadian Food Network show called “You Gotta Eat Here” with John Catucci. The show visited three restaurants in Toronto, including Dr Laffa, with the charismatic chef Yoram Gabay. I’ve had to scale down the recipe the restaurant passed on to the show, as it was for catering quantities of hummus, but it is pretty much impossible to improve. Just the right proportions of garlic, oil and tahini. I enjoyed it with a selection of raw vegetables to dip, with crisp crackers, and yes, rolled inside a soft flatbread with warm roasted chicken.
I enjoyed it so much, I decided I needed to make some more, so I added ‘dried chickpeas’ to the shopping list and when himself returned with the shopping, I eagerly tipped the whole packet into cold water to soak. It seemed a generous amount, so I looked at the pack to double check, and discovered that it was the 1kg packet, rather than the 500g pack I’d been expecting. Oops.
I suppose I could have fished out half of them at the time, but I didn’t want to compromise them and ultimately waste them, so I let them soak and then cooked them all, whilst hunting up different ways to enjoy both chickpeas and hummus. I share with you all in case you ever find yourselves with an unexpected chickpea over-abundance.
So in this bumper fun post, not only have I got the absolute best hummus recipe for you to try, I’ve also gathered some recipes for additional ways to enjoy both hummus and chickpeas. It is by no means exhaustive, but hopefully, you’ll find something to tickle your hummus-loving tastebuds.
How to cook chickpeas
If you’d much rather use tinned chickpeas, by all means skip on down to the recipes.
- Pour your chickpeas into a large bowl and cover with a generous amount of cold water.
- Leave to soak overnight.
- Drain the chickpeas and pour them into a large saucepan.
- Cover generously with fresh cold water and bring to a simmer.
- Simmer gently for 3-4 hours until you can press them easily between finger and thumb.
- Drain your chickpeas and retain the cooking liquid.
Hummus
For years I’ve made hummus using chickpeas in their skins, but I read a lot of recipes that said to remove the skins. I wasn’t sure whether it makes any difference, but as I had so many on hand I decided to give it a try. You can remove the skins by rubbing the cooked chickpeas between two coarse cloths, but to be honest, it was easier just to pinch them off one by one. A little faffy, sure, but they slide off very easily and its done in no time when you’re sitting down listening to the radio. And here’s what I discovered – it DOES make a difference. The hummus is amazingly silky smooth, and I thoroughly recommend it. But if you’d rather not, then the hummus will still be delicious.
700g cooked, drained chickpeas – skins removed
1 clove garlic, peeled
1 tsp salt
1 tbs olive oil
1tbs lemon juice
125ml tahini
1 tbs ground cumin
350ml chickpea cooking liquid
- Put all the ingredients into a blender and blend for 2-3 minutes until smooth and creamy.
- Taste and add more salt/spice to your taste.
- NB Using the cooking liquid from the chickpeas makes the mixed hummus warm, and if you’ve never tasted warm hummus, you are in for an absolute treat! It is a totally different taste experience to chilled hummus, and is how I now eat it all the time.
To Serve
- Spoon your hummus onto a plate and use the back of your spoon to smooth a hollow into the centre.
- Scatter a few whole chickpeas and sprinkle with sumac (or paprika or chilli flakes).
- Drizzle a little of your favourite oil over and serve with bread and/or salad vegetables.
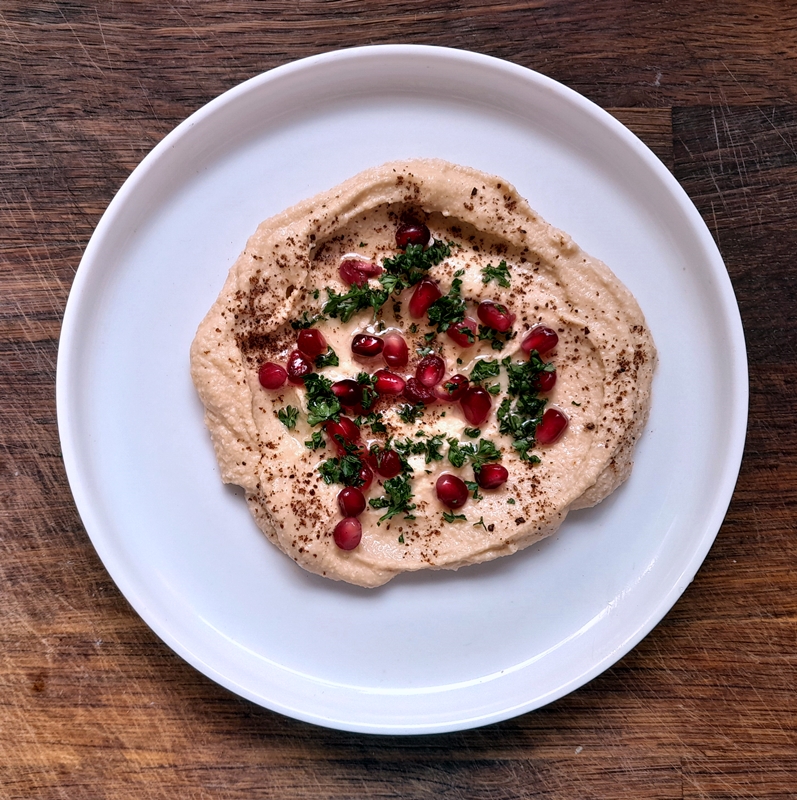
Hummus with pomegranate
This is a new variation for me and one which has swept to first place in my hummus favourites when wanting something quick. The pops of freshness from the pomegranate seeds, together with the sharpness of their juice is a fantastic contrast against the earthy and smooth texture of the hummus. A sprinkling of sumak and some fresh chopped parsley and it is quite a transformed dish!
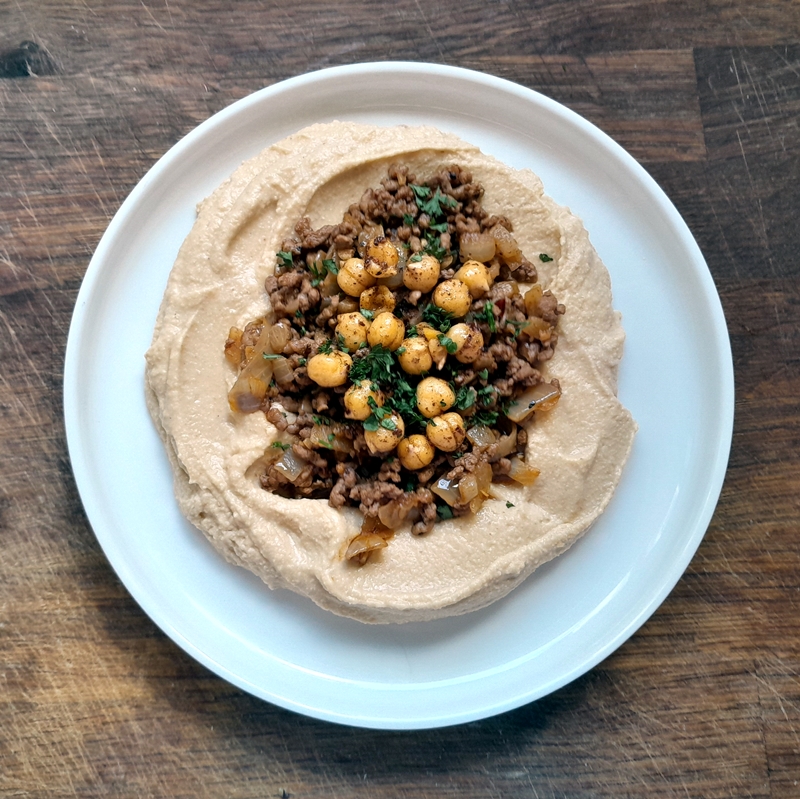
Hummus with Beef or Lamb
I’ve already waxed poetic about the combination of hummus and warm, cooked chicken, and here we have another variation to tickle your taste buds. Serving your fresh and creamy hummus with a topping of spiced beef or lamb mince turns it into an incredibly satisfying – and very filling – meal. There’s probably a scientific reason behind it all, but this serving suggestion is perfect for making a little go a very long way indeed. This quantity, with bread, salad and hummus will be sufficient for four. If you’re cooking just for yourself, I recommend still making this amount, and enjoying it over a few days by giving the small amount you need each time a quick zap to heat it up as needed.
1 tbs oil
1 small onion, chopped fine
1 clove garlic, chopped fine or crushed
250g beef or lamb mince
salt and pepper to taste
¼ tsp sweet paprika
¼ tsp hot paprika
- Fry the onion in the oil over medium heat until golden.
- Add the garlic and the meat and continue stirring until the meat is cooked and browned.
- Season with the salt, pepper and spices.
To serve
- Spoon your warm hummus onto a plate and use the back of your spoon to smooth a hollow into the centre.
- Spoon some of the spiced meat into the centre and scatter a few whole chickpeas.
- Sprinkle with sumac and freshly chopped parsley. Drizzle with a little oil.
- Serve with Arabic bread and salad

Baked Hummus with Cheese
This version takes my enjoyment of warm hummus to the next level. Baking a layer of cheese between two layers of hummus is another incredibly filling meal, this time for anyone vegetarian or vegan, or is a cheese-lover. You can switch things up and just top the hummus with a generous quantity of your favourite cheese, but personally I prefer the soft, melty cheese to be a surprise as you dig in.
For one person:
hummus
your favourite cheese – grated
your favourite oil
a few whole chickpeas
¼ tsp sumak/chili flakes/paprika
- Heat the oven to 200°C, 180°C Fan.
- Spread a layer of hummus in an oven-proof dish.
- Sprinkle a layer of grated cheese over.
- Spread a second layer of hummus over the top.
- Bake until heated through and the cheese melted – about 10 minutes.
- In a small frying pan, heat the oil and add the spices and chickpeas. Toss until heated through and the spices fragrant.
- Spoon over the baked hummus and serve with Arabic bread and salad.
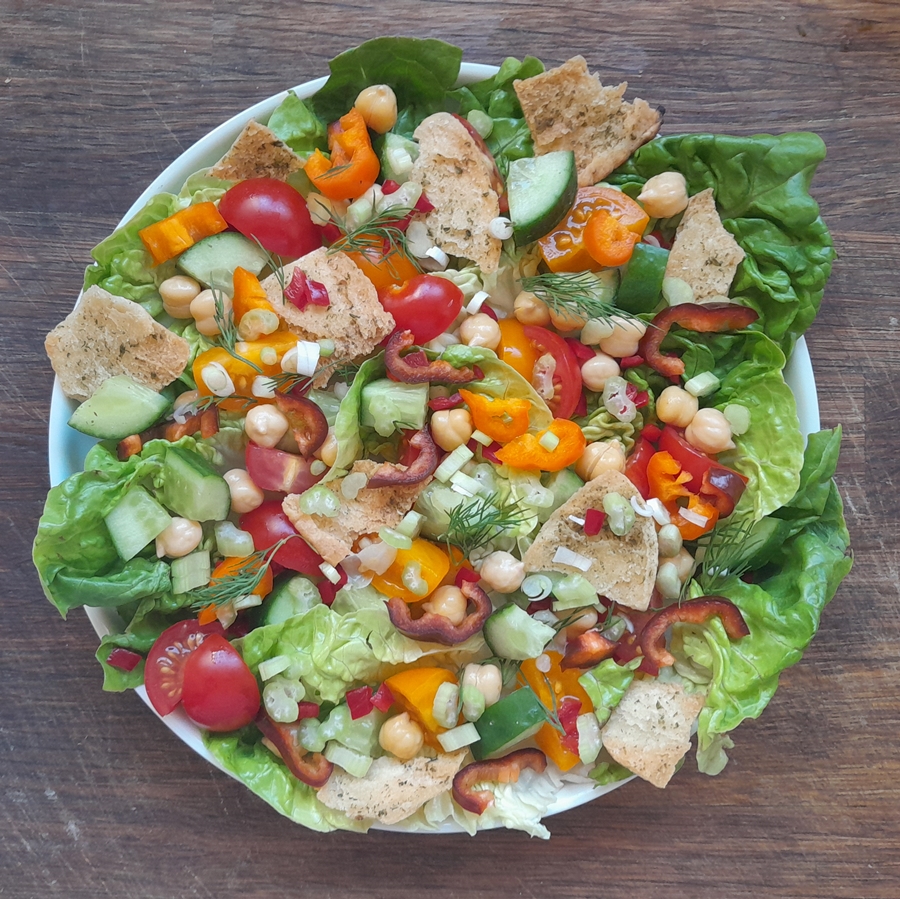
Fattoosh
If you have some extra cooked chickpeas left over from making hummus, then this Egyptian salad is a fantastically versatile main dish or side dish in which to use them up. It is fairly relaxed in terms of ingredients, and can be customised with whatever salad vegetables you have on hand. I’m not a huge fan of arranged salads – and this one isn’t really – but in terms of serving dishes, choose one that is broad, rather than deep, so that all the individual elements can be seen laid out and admired, without being crowded.
The main elements that distinguish fattoosh from other salads are whole chickpeas and pieces of toasted, herbed pitta bread. The contrast between the crunch of the toasted bread and the freshness of the vegetables is very pleasing on the palate The other fresh elements are whatever you like – just don’t cut them into too small pieces. Choose from the list below to craft your own version.
lettuce leaves – torn into smaller pieces
tomatoes – in quarters or eighths
cucumbers – sliced or cubed
fresh capsicum peppers – seeded and sliced
cooked chickpeas
celery – sliced small
radishes – cut in quarters
sweetcorn – unconventional, but I like it
onion – chives/spring onions/red onion
fresh herbs – dill/parsley/coriander
sumak, salt & pepper
vinaigrette or olive oil and lemon juice
stale pitta breads – can also use fresh
mixed dried herbs
olive oil
- Heat the oven to 200°C, 180°C Fan.
- Tear the pitta bread into pieces and separate the two sides so the rough inside is uppermost.
- Arrange the pieces on a baking sheet.
- Drizzle olive oil over the bread and sprinkle with the mixed herbs.
- Bake in the oven until the bread is toasted.
- Set aside to cool.
When ready to serve:
- Arrange your torn salad leaves over your serving dish.
- Scatter your prepared fresh vegetables and chickpeas over the leaves evenly, so that each ingredient can be admired.
- Tuck in the crisp pieces of toasted pitta bread into the salad and scatter over the chopped, fresh herbs and spices.
- Dress with your favourite salad dressing and serve.